Can i jailbreak my xbox 360 to play on-line?

We know that if we use xk3y or x360dock to jailbreak our xbox 360, we can not use it play on-line. Even there is no feed back that use them on-line and get banned, but no one know when the MS will do that, that is risky.
So we can not play on-line if we jailbreak our xbox 360? I found an interesting tools a few days ago. named wholesale X360Pro V4 (Fourth Generation ). The biggest advantage is Play your xbox on live and RGH homebrew on one console ! This is amazing right? The follow is the features from official site:
* NextGen Dual NAND Device
* Easy Switch Between Stock Onboard NAND and Custom NAND by Extenal switch
* No need to cut any tracks on the Xbox360 motherboard
* Easy QSB Solution (Quick Solder Board)
* Easy Wire Install Option Also Available(only 3 wires for slim/5 wires for phat)
* Both Phat and Slim Versions
* Compatible with any xbox360 with 16 MB NAND
* Original Brand NAND to Match Stock For Security & Compatibility
* Built-In USB, support MCU update no open your xbox and no others hardware
* NAND Read/Write Hardware, quickly dump nand (Other SPI Hardware Not Required)
* Compatible with Nandpro 2.0 and 3.0 software
* Boot time almost in 5~30 seconds
* More Premium Features Will Be Announced Very Soon……
The point is Don’t worry to be ban. Maybe the installation is difficult than the dvd flash such sk3y or dock, but this item is great. I want to get one and see how it works.
Thanks for reading!
How to use PB2 (PS3break2) ?
Hey everybody, i got the PB2 today and just tested it. now i will show how it is work. The follow is it, very light, not as heavy as true blue and looks similar with their preceding product ps3break.
What we need:
1. PB2 3.55 CFW
2. PB2(PS3break2) wholesale
2.sd card
3.card reader
Step:
1. Download the PB2 3.55 CFW and unzip it, you wii find a file “PS3UPDAT.PUP”
2. Insert the sd card to your pc, creat a folder named “PS3″(capital letter), then creat a folder named “UPDATE”(capital letter)
3. Put the “PS3UPDAT.PUP” into the “UPDATE” folder
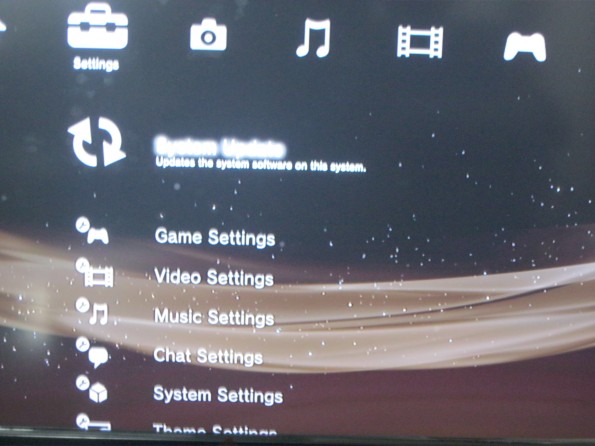
4. Insert the usb into your ps3, turn on your console and select “system update” to install the 3.55 cfw
5. When the update is finished, the console will reboot
6. Then take out the usb, insert the PB2 and go to multiman to choose a game from your external hdd.
7. It will back to the main page, and go to the app to start game!
Enjoy your game!
Thanks for reading!
Do you know PB2 (PS3 break 2)? – The return of the king!
According to the official of ps3 break, their new product will be released soon. The name is PB2 (PS3 break 2) ! It can play v3.6+ games on 3.55 systerm. I know it is as same as true blue. But as a classic brand, i believe its product is worth to expect! Here is the official news:
wholesale Pb2 (PS3break2) is the latest product from PS3break team who ever made a tremendous splash in the PS3 scene. Pb2 can break your own PS3 console and enjoy the latest and most popular PS3 games which require 3.6+ or 3.7+ PS3 firmware. The ps3break team are focused on enhancing the user experience of our customers, play games with it easily!
Features include:
Booting of games designed for PS3 system software v3.6 and above
Runs your existing games and new v3.6+ games from HDD in conjunction with standard backup managers
Does not require the power/eject trick
Custom v3.55 Dongle firmware behaves like OFW when PB2 is not inserted
Manufactured from highest grade components and Actel based
Durable and high quality plastic case design
Tough and durable plastic packaging
Further features to be added as they are developed
On board 2 MBytes SPI flash
Supports Fat and Slim PS3 consoles currently running any firmware up to v3.55 and any PS3 which can be downgraded successfully from v3.6+ to v3.55 (NOTE: requires other tools, PB2 cannot downgrade a console)
Supports all regions of consoles
Supports all regions of v3.6+ games
Rock solid crystal oscillator on board for flawless timings
Looking forward to this product!
How to install E3 flasher? (E3 flasher mainboard installation)
Here is the E3 flasher mainboard which is put in the metal cover:
Put the E3 flasher wholesale into Hard disk warehouse like the HDD install.
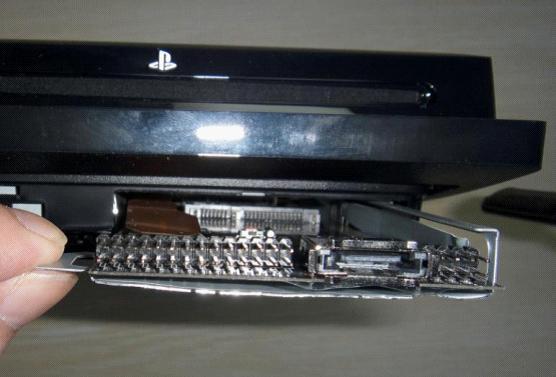
use the left space to put the soft flat cable on the mainboard. use finger to press the flat cable lightly from left to right. if the install is correct, you will hear a sound like snap-in.
Finish the installation:
Put the whole mainboard into the Hard disk warehouse. (Be careful and lightly)
Then put the E3 flasher Vice motherboard on the mainboard. don’t mistake the place.
The last is fixed the Vice motherboard, tighten the screws.
If the installation is correct, power on, you will see the red LED is light.
PS: In order to ensure the installation is successful, you can test the E3 flasher before make the console back.
Connect the ESATA HDD and put the original HDD back to the case.
Set the Vice motherboard to PS3 MODE,OFW, if you can start normal, congratulations!
Thanks for reading!
How to install E3 flasher (slim version cup Installation tutorial)
Step1: install the cup like the follow:
Attention: make sure the cup is placed in a right direction and right place. wholesale E3 flasher is designed precise and it will fix with the mainboard perfectly.
Step2: make the soft cables to 180 ° bend, use scotch tape to fixed it on the clip. keep the soft cables flat on the mainboard, use scotch tape to fix it on the mainboard. (attention: don’t let the tape cover the goldern part) Then the clip is installed.
Attention: don’t make the soft board buckling, just like nature:
get the ps3 back
Step1: put the metal cover back, let the flat cable of soft board out of metal cover.
Step2: put the mainboard back, (attention: make the flat cable through the Hard disk warehouse first before put back the mainboard) screw the 2 black and 2 white screws back. install the antenna
Step3: put back the keyboard plate and the dvd drive. connect the keyboard plate cables first, but don’t make it in the box, you need put the dvd drive back first.
Step4: dvd drive need connect the cables from bottom, press the connector carefully.
then connect the outside cables
then put back the dvd drive and screw the last screws
The last is put back the keyboard flat
Step5: put back the power and connect the cables
Step6: put back the cover and screw all the screws of bottom (not including hard disk houseware screws)
How to install the E3 flasher ? (open the ps3 slim)
What we need:
1 x PS3 (can be downgraded to 3.55)
1 x E3 flasher wholesale
1 x cross screwdriver
1 x The plum blossom with a screwdriver
How to open the PS3 (SLIM)
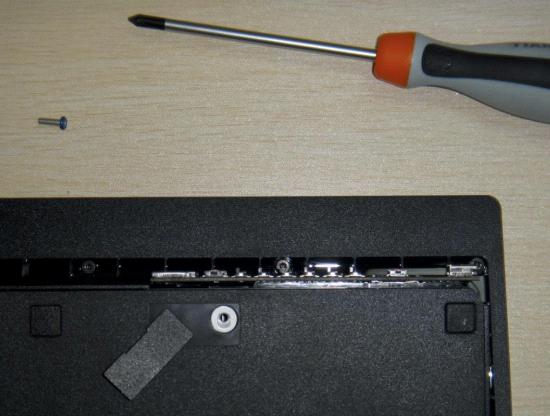
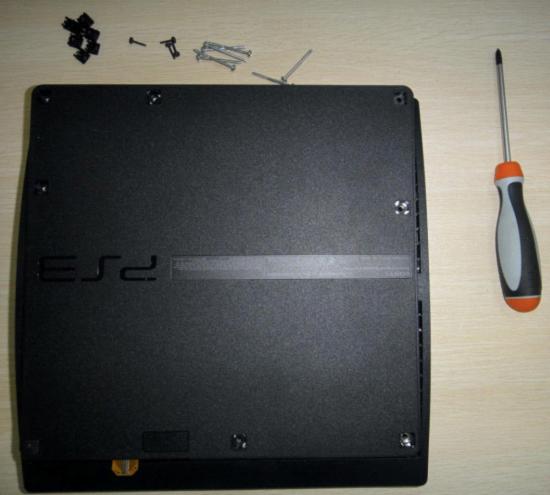
Step1: take down 4 Hexagonal screw the plum blossom at the bottom of PS3
Step2: open the cover of hdd, and take out of the hdd
Step3: Tear seal, take down all the screw
Step4: open the shell
Step5: take out the screw of power and pull up the cables of power, take the power supply out.
Step6: take out the screw in the right and left of the power. (one is bigger and the other is smaller, don’t mistake them)
Step7: take out all the cables of CD driver
One is at the bottom of CD driver, be careful to take it out
Step8: before you take out the CD drive, pull the power keyboard plate first (just detach it not take it down because there is cables on it )
then you can take out the CD drive
Step9: take out the antenna don’t need to take out the metal part. be careful here, and take out the keyboard plate
then it will be like this:
Step10: before take out the mainboard, take down 4 screws first (the white ones for fixing the Hard disk warehouse)
then you can take the mainboard out
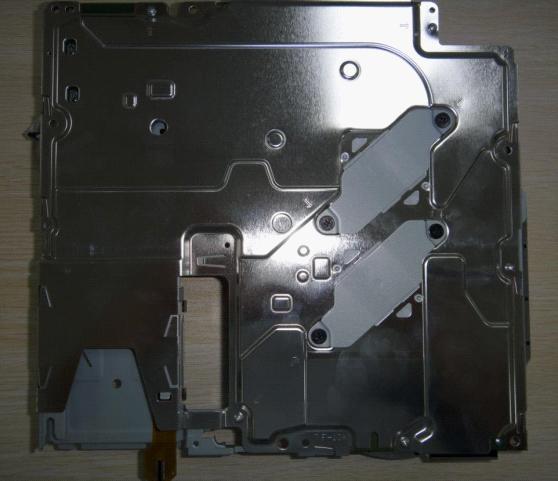
Step11: take out all the screws of the mainboard’s metal cover
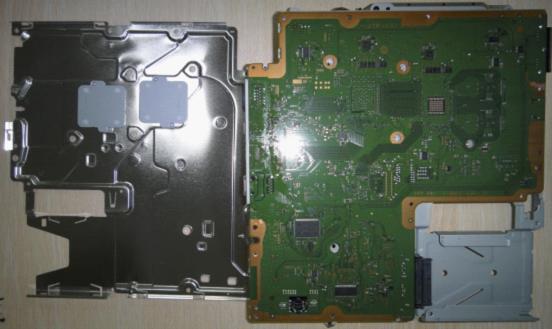
take out the metal cover
How to use x360dock module2 ?
What the x360dock module 2 content:
connect the white data cables and the black data cables. There are white words on the mainboard, “TO DRIVE” means conect with the drive slot, and “USB” means use the soft cables to connect with the dongle

“TO MOTHERBOARD” means contact with the motherboard” right is power and the left is sata.

Attention: be care of the soft cables, make sure it is conected tightness.
module2 install (you can buy the x360dock module1 + module2 wholesale on Game4Deal):
here is a black chip included in the module2. put it on the dongle like the follow picture.
connect the dongle to the controller, like the follow:

How to put software into the sd card:


Download the module2 firmware on the official site: http://www.x360dock.com
use USB Image tool to format the sd card.
open the USB Image tool ,select the drive, and select the second choice.
press “restore”
done!

The follow is the video, please check it:
Thanks for your reading!
How to repair your dstwo if it show “no card insert” ?

As we know Supercard DSTWO is a strong card. If is show “no card insert”, let’s see how to repair it, very easy!
What you need:
1. Any other flash card which is working normal (such as dstt or r4 ect.)
2. The bad wholesale dstwo (show no card insert)
3. a DS/DSL console
4. SD card
Step:
1. Go to the dstwo official site to download the repair package
2. download the newest patch
3. download the newest kernel of the good card
4. unzip them
5. put the “dstwo_load_NDSL.nds” and the newest kernel into the working flash card (dstt or r4)
6. put the card into ds/dsl, when the screen show “insert dstwo, press B to contiune”

7. take out the flash card (do not pow off the console)
8. format the sd card, put the newest kernel and the patch “dstwoupdate.dat” into sd card
9. put sd card into bad dstwo, insert dstwo in your ds/dsl
10. press B, it will begin to repair
When it become 100%, done! You can use your dstwo again!
Thanks for reading!
How to update ak2i to support DSi v1.44?
What you need:
1 x AK2i card
1 x sd card
1 x card reader
Step:
1. Download the v1.44 update package and the newest kernel from official site.
2. Unzip the files and put them into the root of sd card.
3. Insert the sd card into ak2i, put ak2i to the ds or 3ds console
4. Start the update files and you will see the screen like below

5. Press B to continue

6. Press “start” to update

7. When the updating complete., reboot console
8. The icon will change and the card can work on DSi v1.44 perfectly.

Thanks for reading!
How to resolve the problem of your Ace3ds Card?
Problem1: The screen show: menu?
This is because you put a wrong kernel in your Ace3ds, go to the official site to download the newest kernel, unzip it, put all files into the root of sd card , then put the roms (.nds files) into the sd card also. insert the sd to ace3ds, put ace3ds into your console, done.
Problem2: The screen show: “an error occurs” with black background and white words.
This means your card need updating. The problem will occurs on 2 consoles, DSi and 3DS. As i know, if your DSi is updated to v1.44 already, the ace3ds can not work on it. The official have not released the update package yet. But if your console is 3DS v3.0.0-6, go to the official site to download the update package, and the update step is:
1.Download the v3.0.0-6 package and unzip it.
2.Put the .nds file and .dat file into the root of sd card.
3.Put the latest kernel into the root of sd card.
4.Put the sd into Ace3ds, put Ace3ds into the ds. Power on.
5.Start the “update”, and it will update by itself. Do not do any operate when it updating. Make sure the power is full and not power off during the updating.
When it become 100%, reboot the console.
Then the icon will change. And the card can support v3.0.0-6 perfectly.
Problem3: Sometimes, when you want to update your card, the screen show “ID mismatch”
This problem can’t resolve as far. When the Ace3ds official released the 3.0.0-5 update package, this problem sometimes occurs. But it doesn’t matter now, because the newest Ace3ds can work on 3DS v3.0.0-6 perfectly and no need updating.
Problem4: The card can’t be recognized, screen show “no card insert”
This have 2 reasons. one is the card is a bad card, the other is updating wrong. If your console is power off during the updating, the card will be damaged and can’t be recognized anymore or become white screen to freezing!
Problem5: white screen or freeze
The same as Problem4.

